


How to Photograph People Under Harsh Midday Sun Without Getting Dark Faces
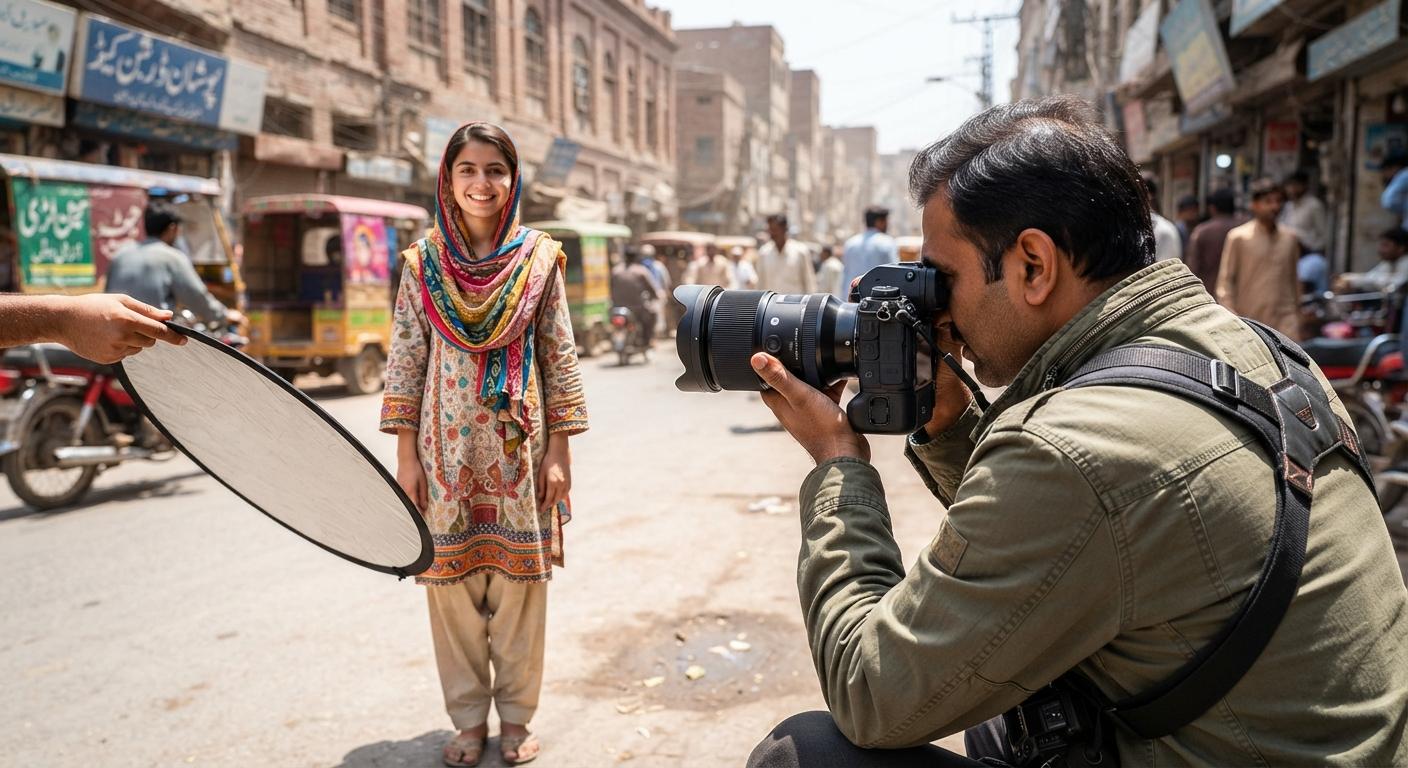
Dark faces in midday sun almost always come down to one core problem: your camera's exposure meter is reading the bright sky or sunlit background and darkening the face to compensate, rather than reading the person's skin tone correctly. The fix isn't better light — you can't control the sun at 1pm in Lahore in June — it's controlling how your camera meters, where you position your subject relative to the light, and whether you add fill light back into the shadows the sun is casting under eyes, noses, and chins.
This guide covers exactly why midday sun causes underexposed faces, the metering and positioning techniques that fix it in-camera, and the practical fill tools — reflectors, flash, and shade — that working photographers in Pakistan actually rely on for outdoor weddings, Eid portraits, and street shoots that can't be rescheduled for golden hour.
Why Does the Camera Keep Underexposing the Face in Bright Sun?
Your camera's light meter doesn't know what a face is — it averages brightness across the frame (or across a selected zone) and tries to render that average as a mid-tone gray. In midday sun, the sky, pavement, and sunlit background are often two or three stops brighter than a person's face, especially if there's any shade or shadow falling across part of it. Left in evaluative or matrix metering mode, the camera exposes for that bright average, which pushes the face — the actual subject — into underexposure.
This gets worse with backlit or side-lit midday portraits, where the sun is behind or beside the subject and the face is in its own shadow while the background is fully lit. The contrast range between a shaded face and a sun-blasted background in Pakistan's midday summer light can easily exceed 5-6 stops, which is a more dynamic range than most sensors can hold detail in at both ends simultaneously.
Real scenario: Shooting outdoor Eid portraits in a Karachi garden at 1pm with a Sigma 56mm f/1.4 DC DN on an APS-C body, evaluative metering consistently rendered faces two stops darker than correct exposure, because the meter was balancing against a bright sky and white-walled background. Switching to spot metering directly on the subject's face corrected exposure immediately, at the cost of letting the background go slightly brighter than ideal — an acceptable trade-off, since a slightly bright background reads better than a dark, muddy face.
Should You Use Spot Metering or Exposure Compensation?
Both work, and the better choice depends on how much control you need in the moment. Spot metering tells the camera to expose specifically for a small area — ideally the subject's face — ignoring the rest of the frame entirely. This is the most reliable fix for isolated portrait shots where the background brightness genuinely doesn't matter to your exposure decision.
Exposure compensation is faster for fast-moving situations, like street photography or candid event coverage, where you don't have time to recompose a spot-metering point on every shot. Dialing in +1 to +1.5 stops of positive exposure compensation while shooting in bright midday conditions with people as the subject compensates for the camera's tendency to underexpose faces against a bright scene, without needing to change metering mode shot to shot.
|
Method |
Speed |
Control |
Best For |
|
Spot metering on face |
Slower — requires recomposing/re-metering per shot |
Highest — exposes precisely for skin tone |
Posed portraits, controlled shoots, single subjects |
|
Center-weighted metering |
Moderate |
Good general balance, still background-influenced |
Small groups where faces are roughly centered |
|
Evaluative/matrix + exposure compensation (+1 to +1.5 stops) |
Fast — set once, shoot continuously |
Good, less precise than spot |
Candid, street, fast-moving event coverage |
|
Manual exposure, metered off skin |
Slowest to set up |
Full control, consistent across a series |
Studio-style outdoor portraits, repeated similar shots |
Real scenario: Covering a mehndi function held outdoors at midday in Lahore, spot metering on every individual guest wasn't practical during candid coverage. Switching to matrix metering with a fixed +1.3 stop exposure compensation dialed in for the duration of the harsh-light window kept faces consistently well-exposed across dozens of fast candid frames, even as backgrounds varied between shaded and sunlit areas.
Does Where You Position Your Subject Matter More Than Camera Settings?
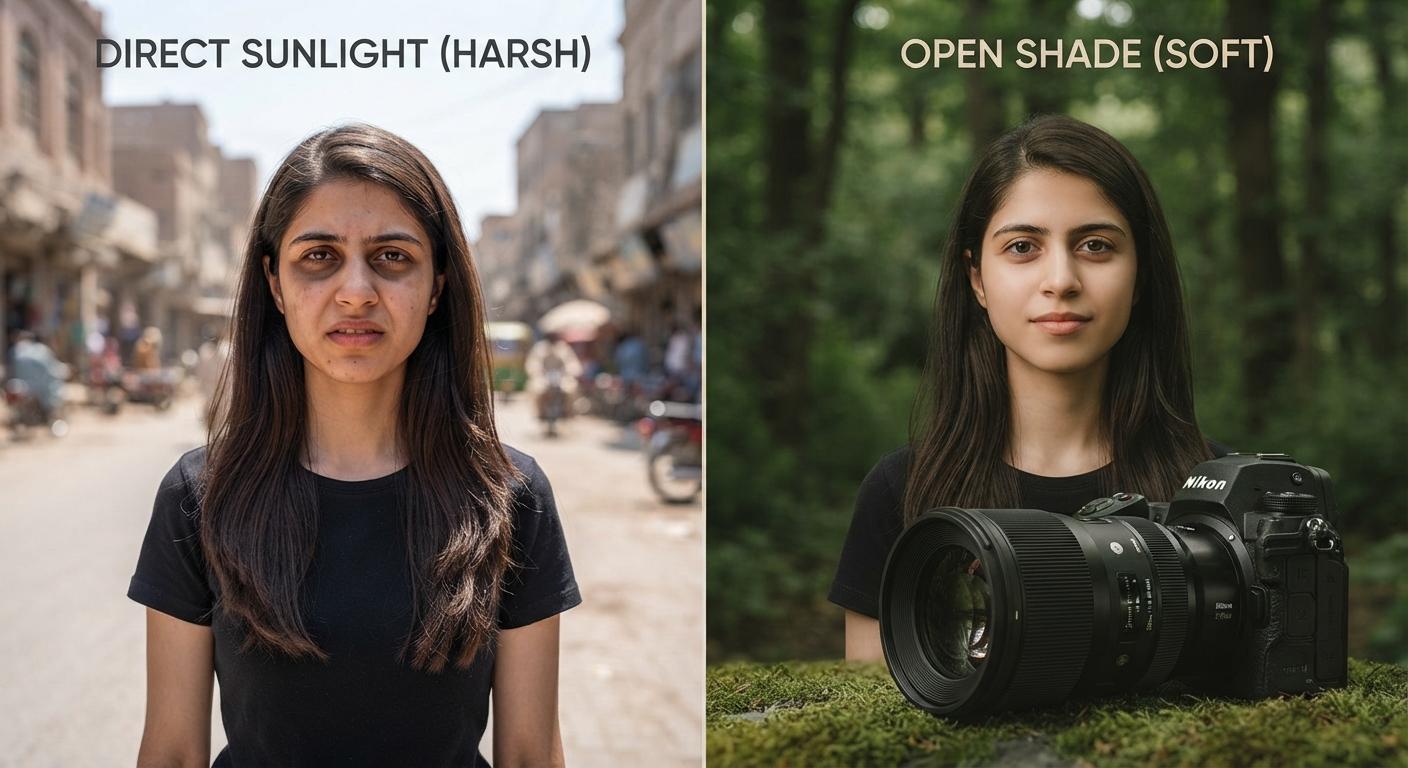
Positioning often matters more than any in-camera fix, because it changes the actual light hitting the face rather than just how the camera interprets it. Direct overhead midday sun creates harsh shadows under the eyes, nose, and chin regardless of exposure settings — this is a lighting-quality problem, not just a brightness problem, and no metering trick fixes shadow shape.
The single most effective positioning fix is turning the subject so the sun isn't directly overhead relative to their face — angling them so the light comes from more of a side angle, or moving them into open shade (under a tree, an awning, or a building's shadow line) where the light is softer and more even, while still using the bright surroundings as natural fill.
Real scenario: During an outdoor wedding shoot in Islamabad at midday, direct sunlight on the couple standing in an open lawn created heavy under-eye and nose shadows regardless of exposure. Repositioning them ten feet to the edge of a large tree's shadow line — still bright enough for a clean exposure, but out of direct overhead sun — immediately softened the shadow pattern and improved skin tone rendering, without changing any camera settings at all.
Do You Actually Need a Reflector or Flash, or Can You Fix It in Editing?
Editing can recover some shadow detail, but it cannot fully replace fill light captured at the time of the shot, especially in RAW files where deep shadow areas under harsh sun often contain noise or simply lack recorded detail to pull back. Physical fill — a reflector or flash — solves the problem at the source and gives a cleaner, more natural result than aggressive shadow recovery in post.
A basic 5-in-1 reflector (available locally in Lahore and Karachi camera markets for roughly PKR 2,000-4,000 depending on size and brand) bounces ambient sunlight back into the shaded parts of a face, softening harsh shadows without adding an artificial-looking light source. For faster-paced shoots where holding a reflector isn't practical, a simple on-camera or off-camera flash set at low power, used purely as fill rather than a primary light source, achieves a similar result and works even when there's no assistant available to hold a reflector.
Real scenario: Shooting street-style portraits during an Eid market visit in Rawalpindi, a small collapsible reflector held by a second person at a low angle beneath the subject's face filled in harsh shadows from the overhead sun, producing noticeably more even skin tone than unedited frames shot without fill — comparable results to what heavy shadow-recovery editing achieved on similar frames shot without a reflector, but with cleaner detail and less visible noise in the shadow areas.
Reflector vs Fill Flash vs Editing-Only: What's the Real Trade-Off?
|
Approach |
Result Quality |
Practicality |
Cost |
|
Reflector fill |
Natural, soft shadow reduction |
Needs a free hand or assistant |
Low (PKR 2,000-4,000 one-time) |
|
Fill flash (low power) |
Consistent, works solo |
Requires flash unit and some practice with power settings |
Moderate (flash unit cost, if not already owned) |
|
Editing-only shadow recovery |
Can look flat or noisy if pushed too far |
No extra gear needed on-site |
Free, but time-intensive per photo |
|
Repositioning into shade |
Most natural-looking result |
Free and immediate, but not always possible depending on location |
Free |
None of these is universally "best" — a controlled portrait session allows time for a reflector or careful positioning, while fast-paced event coverage often relies more on flash and exposure compensation because there isn't time to reposition every subject or hold a reflector for every frame.
The Practical Takeaway
Dark faces in midday sun are an exposure and lighting-direction problem, not a gear problem — the fix starts with how you meter, not what lens or camera you're using. Switch to spot metering on the face for posed shots, or dial in +1 to +1.5 stops of exposure compensation for fast candid coverage where re-metering every frame isn't realistic. Where possible, reposition your subject out of direct overhead sun and into open shade or a side-lit angle, since that solves the harsh shadow problem that exposure settings alone can't fix. Keep a small reflector in your kit for outdoor shoots between late morning and mid-afternoon — it remains the simplest, most reliable way to fill in harsh midday shadows without relying on heavy editing afterward.
Frequently Asked Questions
Why do faces look dark even when the rest of the photo looks properly exposed?
This happens because the camera's meter is balancing exposure across the whole frame or a wide zone, and a bright sky or sunlit background pulls the average exposure down for the face specifically. Spot metering directly on the face, or adding positive exposure compensation, corrects this without affecting how the rest of the scene is exposed.
Is midday sun ever good for portraits, or should it always be avoided?
Midday sun can work well for portraits when the subject is repositioned into open shade, turned to avoid direct overhead light, or given fill light to balance harsh shadows. It's rarely ideal for direct, unmodified overhead sunlight on a face, but with the right positioning and fill, midday shoots are completely workable when rescheduling isn't an option.
What exposure compensation setting works best for bright sunny portraits?
A starting point of +1 to +1.5 stops of positive exposure compensation typically corrects for a camera's tendency to underexpose faces against bright midday backgrounds. The exact amount depends on how much brighter the background is than the subject, so checking the histogram after a test shot is the most reliable way to fine-tune it.
Can I fix dark faces from midday sun photos afterward in editing?
Shadow recovery in editing software can improve moderately underexposed faces, especially when shooting in RAW, but it has limits — pushing shadows too far introduces noise and flat-looking skin tones. It works best as a supplement to correct in-camera exposure, not as a full replacement for proper metering or fill light at the time of shooting.
Do I need an expensive flash setup to fix harsh midday shadows on faces?
No — a basic reflector costing a few thousand rupees, or even a plain white cloth or wall used to bounce light, can significantly soften harsh midday shadows without any flash at all. A flash offers more consistency for fast-paced shooting, but it's a convenience upgrade rather than a requirement for solving the dark-face problem.

 English
 Arabic
 French
 Spanish
 Portuguese
 Deutsch
 Turkish
 Dutch
Dutch
 Italiano
 Russian
 Romaian
 Portuguese (Brazil)