


How a Professional Patch Digitizing Service Creates Accurate Patch Designs
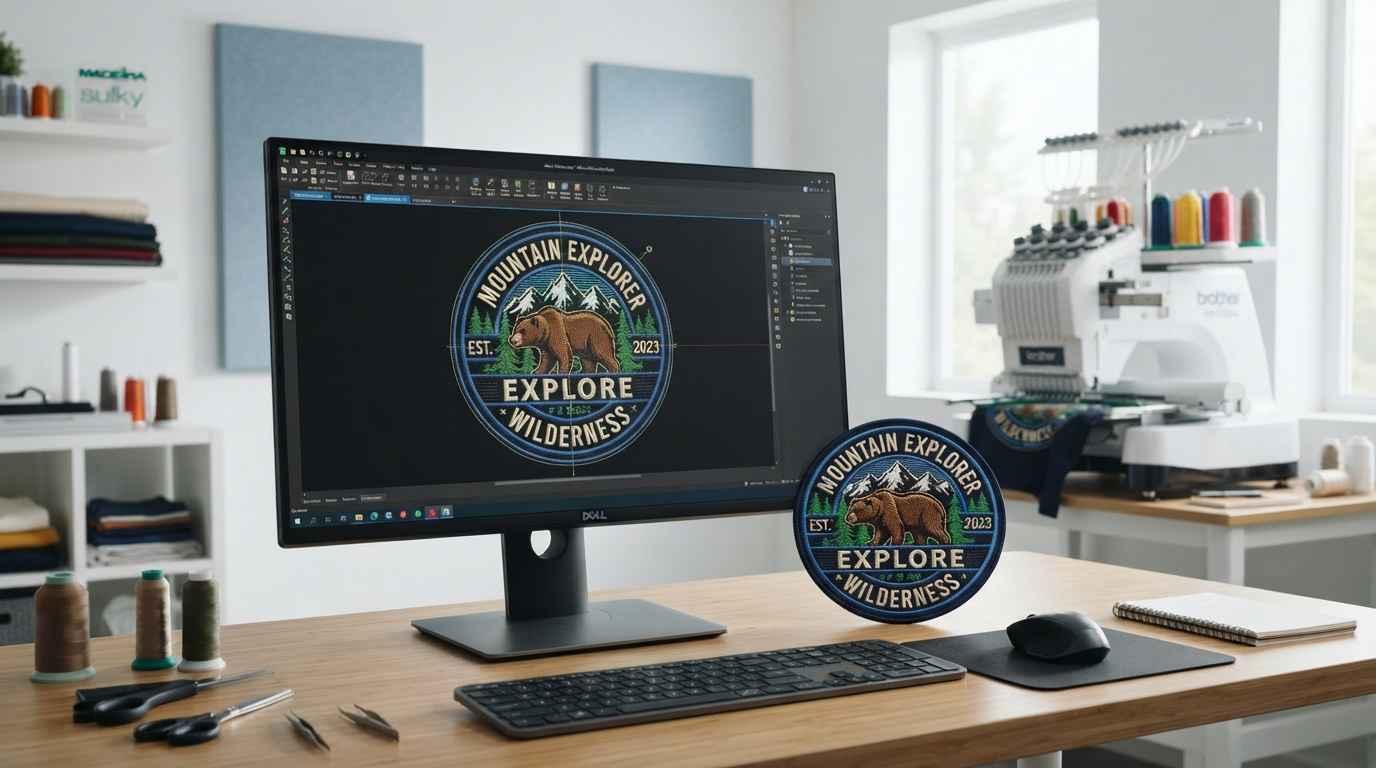
Embroidered patches require more than attractive artwork to produce reliable results. The original design must be converted into carefully planned stitches that account for patch size, material, borders, lettering, colors, density, and machine capabilities. A professional patch digitizing service turns artwork into an embroidery file by analyzing each element and assigning stitch structures that can reproduce the design accurately during production.
Understanding this process helps businesses, apparel brands, embroidery shops, sports teams, and organizations know what goes into preparing a patch design for embroidery and why technical planning matters.
What Is Patch Digitizing?
Patch digitizing is the process of converting artwork into a machine-readable embroidery file specifically intended for patch production.
Unlike a JPEG, PNG, or other image format, an embroidery file contains instructions for an embroidery machine. These instructions define where stitches should be placed, which stitch types should be used, how dense different areas should be, and when thread colors should change.
Patch digitizing also differs from standard embroidery digitizing because the final artwork is usually produced on a patch base before being attached to another product.
The digitizer must therefore consider both the appearance of the design and the physical characteristics of the finished patch.
Why Accurate Patch Digitizing Matters
A patch may contain simple shapes, lettering, logos, borders, or detailed artwork. Every element needs to be translated into a stitch structure that works at the final production size.
If the digitizing is poorly planned, several problems can occur. Small lettering may become difficult to read, borders may look uneven, and dense areas can develop excessive thread buildup.
Accurate digitizing helps reduce these problems by considering the limitations of embroidery before the machine begins stitching.
The goal is not to reproduce every pixel from the original artwork. Instead, the artwork needs to be interpreted in a way that produces a clean and functional embroidered result.
Step 1: Reviewing the Original Artwork
The process usually begins with an assessment of the supplied artwork.
The digitizer examines the logo or graphic to identify major shapes, outlines, lettering, colors, and fine details. The image quality is also considered because low-resolution artwork may contain unclear edges or missing information.
If the original design is available in a clean vector format, it can provide useful references for shapes and outlines. If only a JPEG or PNG is available, the digitizer may need to interpret the artwork before creating the embroidery file.
This initial review helps determine how the design should be constructed for embroidery.
Step 2: Confirming Patch Dimensions
Finished dimensions are important because embroidery details behave differently at different sizes.
A design intended for a large jacket patch may have enough space for detailed lettering and small graphic elements. The same design reduced to a small patch may require simplification.
The digitizer therefore needs accurate width and height information before creating the final file.
If multiple patch sizes are required, each size may need its own adjustments instead of simply scaling the original embroidery file.
Step 3: Defining the Patch Shape
Patch shapes can include circles, rectangles, shields, ovals, custom silhouettes, and many other forms.
The shape determines how the outer border will be constructed and how the internal artwork should be positioned.
A professional workflow considers the border and interior design together. This helps maintain appropriate spacing between the artwork and the edge of the patch.
The final shape should also be compatible with the intended cutting or finishing method.
Step 4: Breaking the Artwork Into Sections
After reviewing the design, the digitizer separates it into logical embroidery areas.
A logo might contain a background, several color sections, lettering, outlines, and an outer border. Each area can require a different stitch structure.
Breaking the artwork into sections makes it easier to determine how the machine should build the design.
It also allows the digitizer to control the order in which different components are embroidered.
Step 5: Selecting Appropriate Stitch Types
Different shapes require different stitch approaches.
Satin stitches can be useful for borders, narrow columns, and outlines. Fill stitches can cover larger areas, while running stitches may be appropriate for selected fine lines.
The stitch type should be chosen according to the width, shape, material, and purpose of each design element.
Using appropriate stitch structures can improve coverage and help the embroidery reproduce the intended shapes more consistently.
Step 6: Planning Stitch Direction
Stitch direction affects the texture and appearance of embroidered areas.
If every section uses the same stitch direction, the finished patch may appear visually flat or may not follow the shape of the artwork effectively.
The digitizer can change stitch angles between different sections to create better visual definition and support the structure of the design.
Stitch direction also interacts with the underlying material, so it needs to be considered as part of the overall embroidery setup.
Step 7: Setting Stitch Density
Stitch density determines how closely stitches are placed within a particular area.
Too little density can result in incomplete coverage, while excessive density can create unnecessary thread buildup and increase the stiffness of the patch.
Professional digitizing aims to use enough stitches to achieve reliable coverage without adding unnecessary thread.
The correct setting depends on the stitch type, design dimensions, thread, and patch material.
Step 8: Building the Patch Border
The border is one of the defining components of an embroidered patch.
It separates the artwork from the edge and contributes to the final shape of the patch. The border needs to be properly positioned and digitized so that it produces a consistent edge.
Its width and stitch density should be appropriate for the patch dimensions.
If the border is too narrow, it may not provide enough definition. If it is unnecessarily dense or wide, it can affect the overall balance of the design.
Step 9: Managing Small Details
Small details require careful consideration during digitizing.
A thin line that appears clearly in the original artwork may become too narrow to reproduce through embroidery. Tiny spaces can also close when stitches are placed close together.
The digitizer may therefore simplify or slightly modify certain details while preserving the overall appearance of the artwork.
This type of adjustment is not necessarily an error. It is often required because embroidery has physical limitations that do not apply to digital graphics.
Step 10: Handling Lettering
Text can be one of the most challenging elements in a small patch.
Embroidery letters need sufficient space for their shapes to remain recognizable. Very small characters may lose internal openings or become difficult to read.
A professional digitizer may adjust letter size, spacing, stroke width, or font selection according to the finished patch dimensions.
If the original lettering is custom-designed, careful reconstruction may also be required to preserve its appearance.
Step 11: Selecting Thread Colors
Thread colors need to be selected based on the artwork and the available thread system.
A digital image can contain subtle color differences that are difficult or unnecessary to reproduce with embroidery thread.
The digitizer identifies the main color areas and assigns suitable thread colors. If a customer requires specific brand colors, providing a thread chart or color reference can improve consistency.
Color selection should also consider the patch base because the same thread can appear different against different backgrounds.
Step 12: Creating the Stitch Sequence
The sequence determines the order in which the embroidery machine creates different parts of the design.
A logical sequence can reduce unnecessary thread trims and jumps while helping maintain proper alignment between overlapping areas.
Background sections are often constructed before foreground elements, while outlines and borders are placed at appropriate stages according to the design.
The sequence is not simply about reducing production time. It can also affect how different sections interact as the patch is built.
Step 13: Using Underlay Correctly
Underlay stitches can provide a foundation for certain embroidery areas.
They can help support top stitches and influence coverage, texture, and stability. However, the appropriate underlay depends on the design, material, stitch type, and production conditions.
Too much underlay can contribute to unnecessary thread buildup, while insufficient support may affect the appearance of top stitching.
Professional digitizing considers underlay as part of the complete stitch structure rather than applying one setting to every design.
Step 14: Considering the Patch Material
Patch material can influence how the embroidery behaves.
Twill, felt, synthetic fabrics, and other patch bases have different characteristics. Some materials may require different density or underlay settings to achieve suitable coverage.
The digitizer should know the intended material when possible so the file can be prepared with those conditions in mind.
A design that works well on one patch base may require adjustments when produced on another material.
Step 15: Reviewing the Digital Stitch File
After the design has been digitized, the file should be reviewed using embroidery software.
A stitch preview can reveal potential problems with sequencing, density, thread changes, jumps, and overlapping sections.
The artwork should also be viewed at the intended finished size. A design may look excellent when enlarged on a computer screen but contain details that are too small to reproduce reliably at its actual patch dimensions.
Step 16: Performing a Test Stitch-Out
A test stitch-out provides information that a digital preview cannot fully provide.
The design can be stitched onto the intended patch material and examined for coverage, lettering, borders, alignment, and overall appearance.
If problems appear, the digitizing file can be adjusted before a larger production run.
For commercial orders, testing can be particularly useful when the design is complex or being produced at an unfamiliar size or on a new material.
How Professional Digitizing Handles Design Limitations
Not every element in digital artwork can be transferred directly into embroidery.
Gradients may need to be interpreted through thread colors or stitch techniques. Extremely thin lines may need to be thickened, while small text may need to be enlarged or simplified.
A professional digitizer makes these decisions based on the final physical product.
The objective is to preserve the identity and important visual features of the artwork while adapting them to embroidery's technical requirements.
Why Patch Size Affects Accuracy
Patch size has a direct relationship with the amount of detail that can be reproduced.
A larger patch provides more physical space for letters, lines, and graphic elements. A smaller patch limits the available area and may require simplification.
This means that resizing an embroidery file is not always as simple as changing its dimensions.
When the size changes significantly, stitch density, underlay, lettering, and fine details may need to be recalculated or adjusted.
Patch Digitizing vs Standard Embroidery Digitizing
Although both processes create machine embroidery files, patch digitizing has additional considerations.
A standard embroidery design is often stitched directly onto a garment or other fabric. A patch design is usually created on a separate base and later finished and attached to another item.
The border, patch shape, edge treatment, and material therefore become especially important.
The digitizer must consider how the complete patch will look and function rather than focusing only on the internal embroidery.
Common Problems Caused by Inaccurate Digitizing
Inaccurate digitizing can lead to several visible and production-related issues.
Common examples include uneven borders, excessive thread density, poor lettering, gaps between shapes, unnecessary thread changes, and distorted small details.
In some cases, the design may also cause thread breaks or unnecessary machine stops.
Many of these problems can be reduced by reviewing the design carefully before production and testing it when appropriate.
What Information Should Customers Provide?
Clear project information helps the digitizer prepare the file correctly.
Customers should provide the best available artwork along with the intended patch dimensions, shape, material, thread colors, and embroidery machine format.
If the patch will be produced in several sizes, those dimensions should be provided before digitizing.
Any special requirements for lettering, branding, borders, or production should also be communicated at the beginning.
How to Maintain Consistency Across Multiple Patches
Organizations and businesses often need the same patch produced repeatedly.
A properly prepared master embroidery file can help maintain consistent stitch placement, colors, lettering, and borders across production runs.
When different sizes are required, maintaining separate files for each approved size can help prevent problems caused by excessive scaling.
Keeping the original artwork and approved specifications together can also simplify future revisions.
Final Thoughts
Professional patch digitizing combines graphic interpretation with embroidery production knowledge. The process begins with reviewing the artwork and confirming the patch dimensions, shape, material, and other specifications. From there, the digitizer creates suitable stitch structures, manages density and stitch direction, handles lettering and colors, builds the border, and organizes the stitch sequence.
Testing and reviewing the embroidery file can help identify problems before production. This is particularly important for detailed artwork, small lettering, unusual patch shapes, and designs that will be produced in multiple sizes.
Accurate patch digitizing is ultimately about adapting digital artwork to the physical realities of embroidery. When paths, stitches, colors, borders, and dimensions are planned together, the resulting file can provide a reliable foundation for producing consistent embroidered patches.
FAQs
Q1. What does a professional patch digitizing service do?
It converts artwork into an embroidery file specifically prepared for patch production, considering stitch types, density, sequencing, borders, lettering, colors, dimensions, and materials.
Q2. Why does patch size matter in digitizing?
Patch size determines how much physical space is available for details. Smaller patches may require simplified artwork, larger lettering, or adjusted stitch settings.
Q3. Can detailed artwork be used for embroidered patches?
Yes, but some fine details may need to be simplified or modified so they can be reproduced reliably through stitches.
Q4. Why is the patch border important?
The border helps define the patch shape and creates a finished edge around the embroidered artwork. Its construction needs to be appropriate for the patch size and material.
Q5. Does every patch require the same stitch density?
No. Density depends on factors such as design size, stitch type, patch material, thread, and the amount of coverage required.
Q6. Why should a patch be test stitched?
A test stitch-out shows how the digital file performs on actual material. It can reveal issues with density, lettering, borders, alignment, or coverage before larger production begins.
Q7. Can one embroidery file be used for different patch sizes?
Sometimes, but significant size changes may require separate adjustments. Density, lettering, underlay, and small details can behave differently at different dimensions.
Q8. What information should I send for patch digitizing?
Provide the clearest artwork available, finished dimensions, patch shape, intended material, preferred thread colors, embroidery machine format, and any special design requirements.

 English
 Arabic
 French
 Spanish
 Portuguese
 Turkish
 Dutch
Dutch
 Italiano
 Russian
 Romaian
 Portuguese (Brazil)
 Greek
Greek