


How Long Does Solar Inverter Installation Take in Perth Homes?
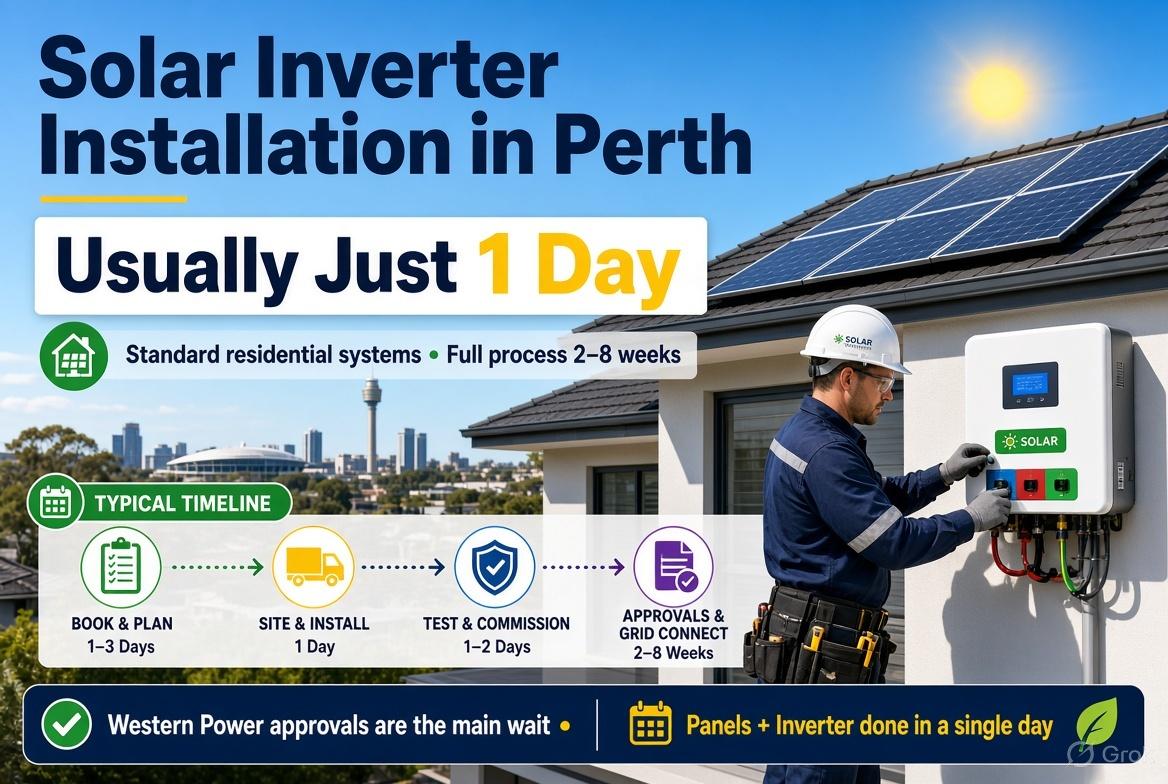
Thinking about installing a solar inverter in your Perth home? One of the first questions you may have is how long the work will take and whether you will need to rearrange your daily routine.
The good news is that installing or replacing a residential solar inverter is often a relatively quick job. However, the total time depends on whether you are replacing an existing inverter, installing a complete solar system or upgrading an older system that needs additional electrical work.
For a straightforward inverter replacement, the work may be completed within a few hours to one working day. A new solar system or a more complex upgrade can take longer, and grid approval or meter configuration may extend the time before the system can operate.
This guide explains the typical timeframes, installation steps, possible delays and what Perth homeowners can do to prepare.
1. How Long Does Solar Inverter Installation Usually Take?
The installation time depends on the work involved. The following estimates are general planning guides, not guaranteed appointment durations.
|
Type of installation |
Typical planning estimate |
|
Straightforward inverter replacement |
A few hours to one working day |
|
New inverter with additional electrical work |
One working day or longer |
|
Complete residential solar installation |
Usually 1–3 days |
|
Larger or complex system upgrade |
May take several days |
The Australian Government's Solar Consumer Guide states that a complete residential solar installation can take 1–3 days, depending on system size and job complexity. This includes work beyond simply mounting an inverter.
A replacement may be faster because the solar panels, mounting equipment and much of the existing wiring are already in place. However, if the replacement requires switchboard changes, wiring repairs or a different system design, the work may take longer.
It is also important to distinguish between installation time and the entire process. Connection approval, electrical compliance paperwork and smart-meter configuration can add time before your solar system is ready to operate.
2. What Happens During Solar Inverter Installation?
Understanding the installation process can help you know what to expect on the day.
Step 1: Site assessment and preparation
Before work begins, your installer checks the existing equipment, switchboard, wiring and proposed inverter location.
If you are replacing an inverter, the installer may also review its fault history and warranty. For a new system, they will confirm the design and where the inverter should be mounted.
This preparation helps identify problems before they cause delays.
Step 2: Isolating the electricity supply
The installer safely isolates the relevant equipment before removing or connecting electrical components.
You may experience a temporary interruption to electricity while the work is carried out. Ask your installer in advance whether the interruption will affect the whole house and how long it is expected to last.
Step 3: Mounting and connecting the inverter
The installer positions the inverter, secures it according to the manufacturer's instructions and connects the required wiring.
For Perth homes, location matters because hot weather can affect equipment performance. A shaded, well-ventilated location is often preferable, provided it meets the manufacturer's installation requirements and applicable electrical standards.
Step 4: Testing and commissioning
Once the inverter is installed, the installer checks the connections, safety measures and system operation. They also configure the equipment and explain any monitoring app or display.
Commissioning means checking that the system has been installed correctly and is ready for its intended operation.
Step 5: Paperwork and connection arrangements
The installer completes the required compliance documentation and manages any outstanding connection or metering requirements.
A physically installed inverter is not necessarily ready to export electricity to the grid immediately. Follow your installer's instructions about when the system can be switched on.
3. What Factors Can Make Installation Take Longer?
Several factors can affect how quickly an inverter installation is completed.
The type of job: Replacing a compatible inverter is generally simpler than installing a new solar system or redesigning an existing one.
Switchboard condition: Older switchboards, outdated protective equipment or wiring that needs upgrading can add work. Any additional work should be explained and costed before it proceeds.
System size and complexity: Larger systems, multiple inverters, battery integration and complicated wiring arrangements may require more installation and testing time.
Access to the installation area: Restricted access, difficult mounting locations or roof-related work can slow progress. The installer also needs to follow appropriate safety procedures.
Equipment availability: If the selected inverter or a required component is unavailable, the installation may need to be rescheduled.
Grid and meter requirements: Connection approval and meter configuration are separate steps from physical installation. Their timing depends on the network, retailer and the specific property.
Discuss these factors when requesting a quote so that the installer can provide a realistic schedule for your home.
4. Perth-Specific Requirements That Can Affect Your Timeline
Perth's hot summers make inverter placement especially important. The Australian Government recommends positioning the inverter close to the switchboard and, where possible, on a shaded wall. Extreme heat can shorten an inverter's service life.
Western Australia's connection rules also matter when installing or upgrading a system.
From 1 May 2026, updated requirements apply to most new and upgraded solar and battery systems connected to the South West Interconnected System. These include relevant inverter standards and requirements for remote management or an applicable export limit.
This does not mean every inverter replacement requires a lengthy approval process. The exact requirements depend on the work being undertaken. For example, the WA Government states that an inverter replaced with a similar or exact replacement under warranty is exempt from the new system functionality requirements described in its guidance.
If you are adding a battery, changing inverter capacity or substantially upgrading your system, ask your installer to confirm the applicable rules and connection process before scheduling the work.
You can check the official guidance here: WA Government solar and battery requirements.
5. What Delays Should You Prepare For?
Even when the installation itself is straightforward, a few issues can affect the overall schedule.
· Approval delays: Network connection approval may need to be completed before installation or grid connection, depending on the work.
· Meter changes: Your existing meter may need replacement or reconfiguration before the system can operate as intended.
· Unexpected electrical work: An inspection may reveal switchboard or wiring issues that were not apparent during the initial quote.
· Weather and site safety: Very hot conditions, storms or unsafe working conditions may require changes to the schedule.
· Equipment availability: Supply problems can delay the planned installation date.
The Australian Government notes that connection agreements can take up to 30 business days in some areas. This is a possible administrative timeframe, not a standard delay for every Perth installation.
To reduce uncertainty, arrange an assessment early, confirm equipment availability and ask who will handle approvals and meter arrangements.
6. How Can You Prepare for Installation Day?
A little preparation can help the work proceed smoothly.
1. Confirm the scope of work. Check whether the quote covers an inverter replacement only or includes other electrical work.
2. Provide clear access. Keep the switchboard and proposed inverter location accessible.
3. Discuss power interruptions. Ask when electricity will be isolated and whether sensitive equipment needs attention.
4. Confirm the installation location. Check that the inverter will have suitable shade, airflow and space for servicing.
5. Ask about the final checks. Confirm how testing, compliance documents and meter configuration will be handled.
6. Clarify the switch-on date. Do not assume the system is ready for normal operation as soon as the installer finishes mounting the inverter.
Choose an appropriately accredited installer and ask for a written schedule that distinguishes installation day from any remaining connection work.
Conclusion: Plan Your Solar Inverter Installation With Confidence
For many Perth homeowners, a straightforward solar inverter replacement can be completed within a few hours to one working day. A complete solar installation generally takes longer, with the Australian Government giving a typical timeframe of one to three days.
The final schedule depends on the equipment, property condition, electrical work and any connection or metering requirements. Planning ahead and confirming these details with your installer can help prevent unnecessary delays.
If you are considering a new inverter or upgrading your existing solar system, explore the information available on Solar 365's solar inverters in Perth page. Understanding your options and requesting a clear installation plan can help you prepare for the work and get your system operating safely.

 English
 Arabic
 French
 Spanish
 Portuguese
 Deutsch
 Turkish
 Italiano
 Russian
 Romaian
 Portuguese (Brazil)
 Greek
Greek